
Getting started with Cellarnova Resto
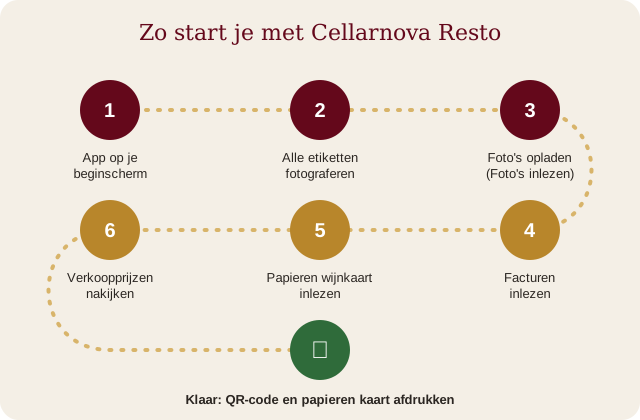
This guide is for the owner or manager of a restaurant who is starting with Cellarnova. You work through six steps, in this order. Most of the work is photographing your bottles; Cellarnova does most of the rest by itself. At the end your wine list is online, with a QR code for your guests, and you can also print it on paper.
Why in this order?
- Your bottles first. Everything depends on your wines: the invoices and your paper wine list are linked to the wines that are already in your cellar. If they are not there yet, there is nothing to link to.
- Then your invoices. They bring the purchase price, the supplier and, if you want, the quantities to the right wine.
- Then your paper wine list. It brings the selling prices and shows straight away what does not match: wines on your list that are not in your cellar, and the other way round.
- Finally you check the selling prices and print. That way your list is correct from day one.
Step 1. Is Cellarnova on your smartphone as an app?
Look on the home screen of your smartphone for the Cellarnova icon (a bottle and a glass on a dark red background). If it is there, go to step 2. If it is not, first put Cellarnova on your home screen. After that it works like a real app, and you can upload photos from your camera roll.
On iPhone and iPad, in Safari:
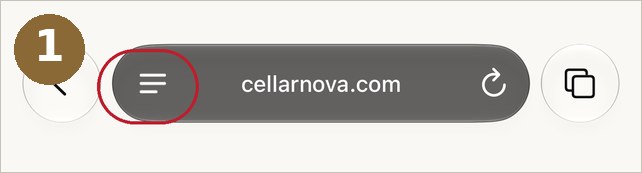
- Open cellarnova.com in Safari and, at the bottom on the left of the address bar, tap the menu button (picture 1).
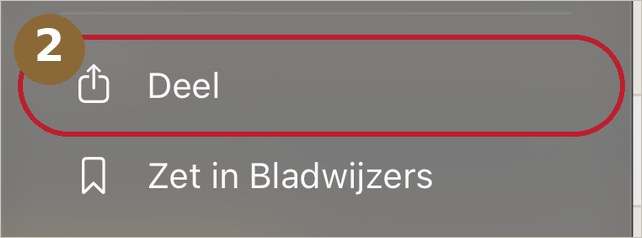
- Tap Share (picture 2).
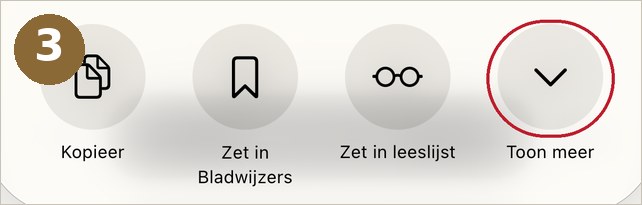
- Tap View More (picture 3).
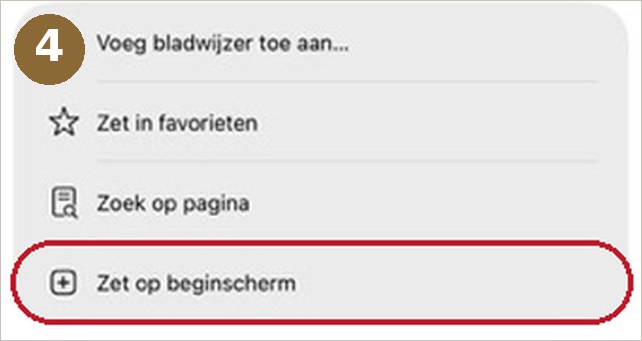
- Tap Add to Home Screen (picture 4).
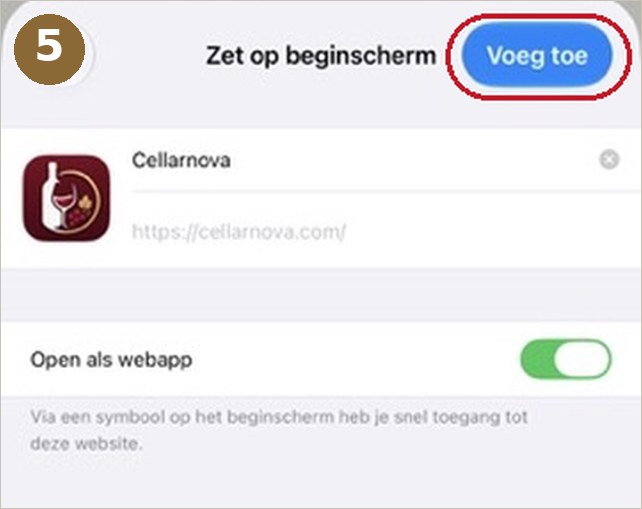
- Tap Add at the top right (picture 5).
On Android, in Chrome: open cellarnova.com, tap the three dots at the top right and choose Add to Home screen (or Install app). If you have a Samsung, do it in Chrome and not in Samsung Internet.
Step 2. Photograph all your labels
With your smartphone camera, take a photo of the label of every wine in your business, even if there are hundreds. You do not have to type anything: Cellarnova looks up the name, the producer, the vintage, the price, the taste profile and the background itself. You can do it in parts, for example rack by rack.
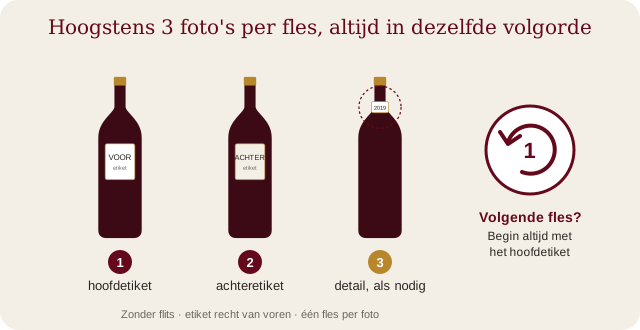
- At most three photos per bottle, always in the same order: first the main label (the front label), then the back label, and only if something is missing a detail (the neck label or the vintage). Two photos are usually enough.
- Always start each bottle with the main label. That is how Cellarnova knows where a new bottle begins: the photos are uploaded with the time you took them, and a new main label means a new bottle. So you do not have to wait between two bottles; just keep photographing.
- One bottle per photo, the label straight from the front and filling the picture, without flash: glare on the glass makes text unreadable.
- Use the original photos from your camera roll, not photos that were forwarded via WhatsApp.
Step 3. Upload your photos
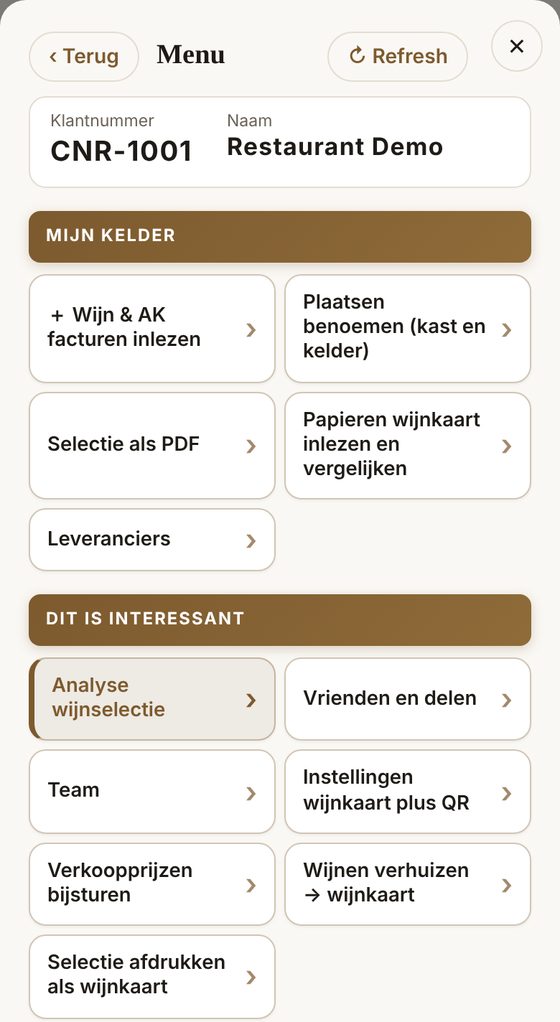
- Open Cellarnova and tap Back office at the top. Under My cellar, tap + Wine & read purchase invoices.
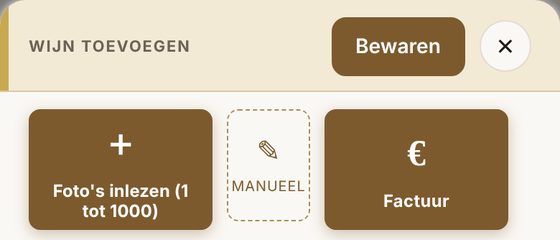
- Tap Read in photos (1 to 1000).
- Under Where do these bottles go?, choose the location My restaurant. Only bottles in that location appear on your wine list; you can put reserve bottles in Cellar.
- Tap Choose photos and select all the photos of your labels in your camera roll. On a computer you can also Choose a folder.
- Finished uploading? Tap My photos are complete.
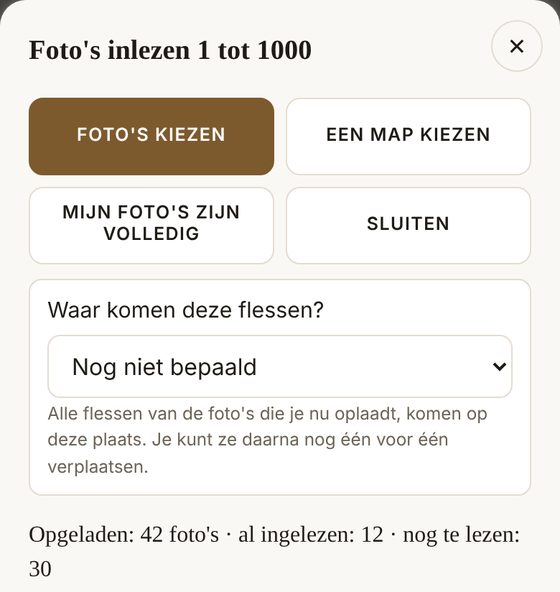
Feel free to put your phone down. We read your photos on our server; that carries on if you close the app. A few bottles are usually there within a quarter of an hour; a full stock of hundreds of bottles takes a few hours, sometimes until the next morning. As soon as your bottles are in your cellar, you get an email. Only go on to step 4 when your whole stock has been processed.
Then a quick check. Cellarnova cannot read the number of bottles and the location from a photo. Adjust them with − and + on the bottle's card, or with Edit, or let the quantities come from your invoices in step 4.
Step 4. Read in your purchase invoices
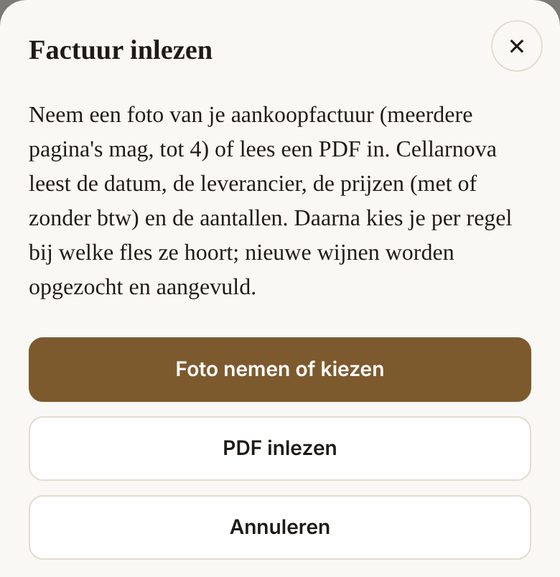
Via Back office → + Wine & read purchase invoices → Invoice, choose Take or choose a photo (up to four pages) or Upload a PDF. Each invoice goes to the background: you do not have to wait and can upload the next one straight away. As soon as an invoice has been read, a banner appears at the top. There you choose what you take over:
- Purchase prices with the right wine;
- Link: the supplier and the invoice with the bottle, so that you later have an order list per supplier;
- Quantities added to your stock;
- New wines created that are not yet in your cellar.
Every supplier goes into your Suppliers list (Back office → My cellar), with its details and a fixed number. The window also shows which wines on an invoice still need a label photo.
Careful with the quantities. If you already counted your stock correctly in step 3, do not add the quantities of an old invoice again: then choose only the purchase prices and linking. Otherwise those bottles are in your stock twice.
Step 5. Read in your paper wine list
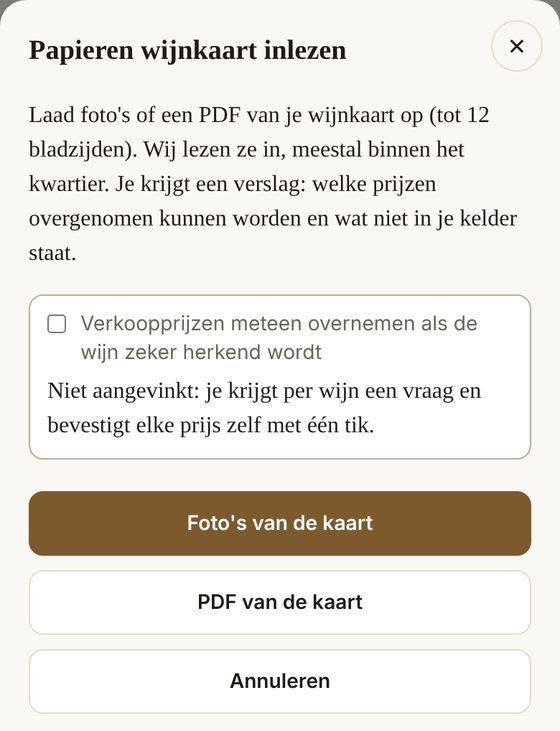
Via Back office → Read in and compare paper wine list you upload photos or a PDF of your current wine list, up to 12 pages. You will also find the same button under + Wine, next to Read in photos, manual and invoice: there it is called paper list. Only do this once your bottles are in your cellar (steps 2 and 3): every line of your list is linked to a wine that is already there. Cellarnova reads the selling prices and finds the right wine in your cellar for each line. If you leave the box Take over selling prices straight away unticked, you confirm each price yourself with one tap.
You get a report that shows straight away what does not match:
- On the paper wine list, not in your cellar: a wine you have not uploaded a photo of yet. Choose Still to scan (as soon as you photograph the bottle, it is linked automatically) or No longer, remove.
- On the digital wine list, not on paper: a wine you photographed but that is not on your list. Choose KEEP on the DIGITAL list or REMOVE from the DIGITAL list.
Step 6. Check your selling prices
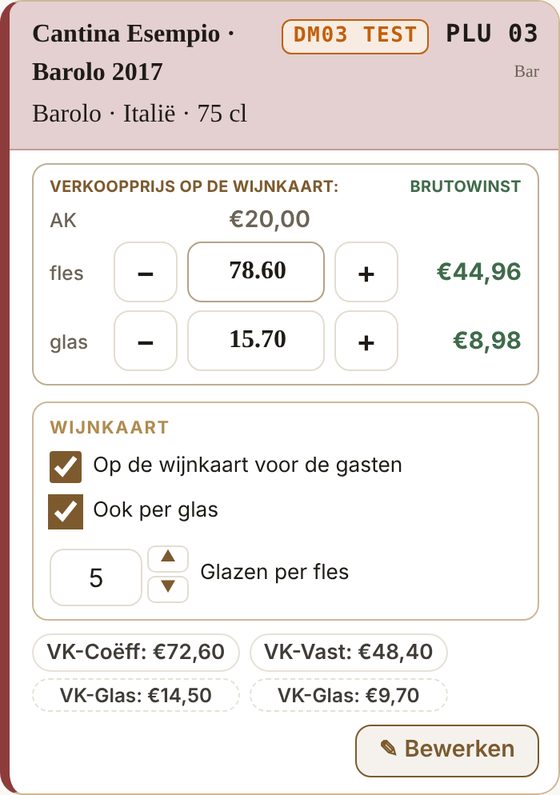
Via Back office → Adjust selling prices you see all your wines one below the other. Check that every wine on your list has a selling price, and fill in missing prices yourself: with − and + or by typing the amount. Every change is saved straight away. Under each wine there are two suggestions (SP-Coeff and SP-Fixed), calculated from your purchase price; on the right you see your gross profit. Cellarnova never fills in a selling price by itself: you always type the price yourself. With the box On the wine list for guests you decide which wines your guests see.
Wines by the glass. Tick Also by the glass for the wine, set the number of Glasses per bottle with the arrows and fill in the price per glass. That wine then appears for your guests under the button By the glass.
You do not need to mark half bottles: a bottle of 35 to 38 cl appears automatically under the button ½ bottle. Do check that the volume is correct; you see it in small print next to the wine code, for example 37.5 cl.
Done: your wine list is online
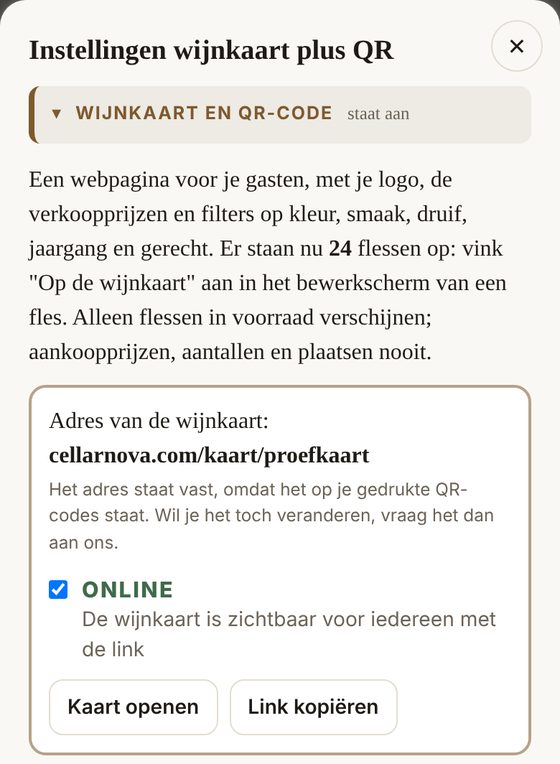
Via Back office → Wine list settings plus QR, check that the box ONLINE is ticked. Your guests then see your wine list on their own phone, in their own language, with your logo and your selling prices.
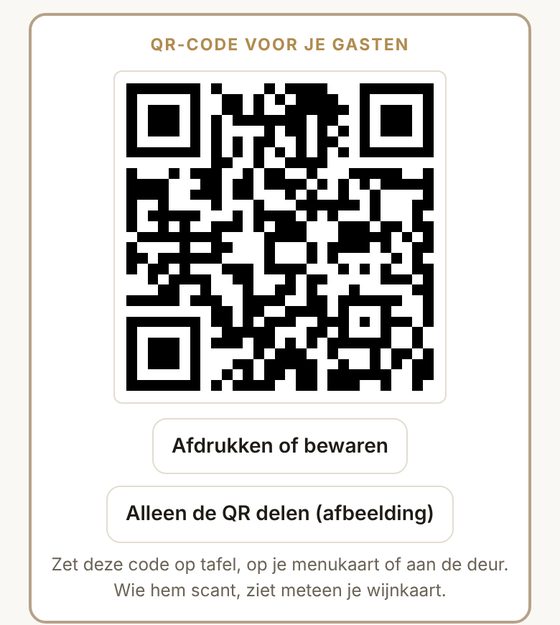
The QR code. Further down the same screen is the QR code for your guests. Tap Print or save and put the code on the table, on your menu or at the door. Anyone who scans the code sees your wine list straight away.
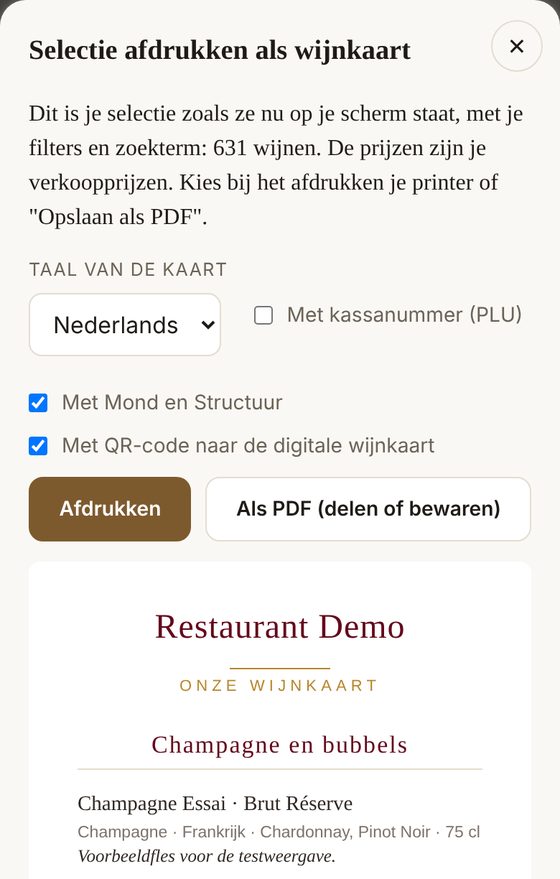
The wine list on paper. Via Back office → Print selection as wine list you print a classic wine list, or save it as a PDF. Note: Cellarnova prints the selection that is currently on your screen. If you want everything, clear your filters first. You can also print just part of it: for example set a filter on Italy or on white, and then print. At the top you choose the language of the list and whether the till number, Palate and Structure and the QR code should be included. On an iPhone, tap As PDF (share or save) and choose Print in the share menu.
Need help?
Everything is explained in detail in the user guide. If you get stuck, email us at hallo@cellarnova.com.